 English
- English
-
 Español
 -
 Português
 -
 русский
 -
 Français
 -
 日本語
日本語 -
 Deutsch
 -
 tiếng Việt
 -
 Italiano
 -
 Nederlands
 -
 ภาษาไทย
 -
 Polski
 -
 한국어
한국어 -
 Svenska
 -
 magyar
 -
 Malay
Malay -
 বাংলা ভাষার
 -
 Dansk
Dansk -
 Suomi
Suomi -
 हिन्दी
 -
 Pilipino
 -
 Türkçe
 -
 Gaeilge
 -
 العربية
 -
 Indonesia
 -
 Norsk
Norsk -
 تمل
تمل -
 český
český -
 ελληνικά
 -
 український
 -
 Javanese
 -
 فارسی
فارسی -
 தமிழ்
தமிழ் -
 తెలుగు
 -
 नेपाली
 -
 Burmese
 -
 български
 -
 ລາວ
ລາວ -
 Latine
 -
 Қазақша
 -
 Euskal
 -
 Azərbaycan
 -
 Slovenský jazyk
 -
 Македонски
 -
 Lietuvos
 -
 Eesti Keel
 -
 Română
 -
 Slovenski
 -
 मराठी
मराठी -
 Srpski језик


How to Use Self-Adhesive Eyelashes
Self-adhesive eyelashes have gained immense popularity in recent years due to their convenience and ease of use. Unlike traditional false lashes that require glue, self-adhesive lashes come with a pre-attached adhesive strip, making them an ideal choice for those who want to enhance their lashes without the hassle of applying glue. In this guide, we'll walk you through the steps of using self-adhesive eyelashes, ensuring you achieve a natural and stunning look.
Preparation
Before you begin, it's essential to ensure that your hands and eyes are clean. Wash your hands thoroughly to remove any dirt, oil, or debris that could interfere with the application process. Additionally, make sure your eyelids are free of makeup, moisturizer, or any product that could prevent the adhesive from sticking properly.
Step 1: Choose the Right Pair
Press on lashes come in various lengths and styles. When choosing one style, consider your natural lash length, eye shape, and the occasion for which you'll be wearing them. For everyday use, it can last for 5-7 days when we wore them, opt for a natural-looking pair that complements your existing lashes. For special occasions, you may want to choose a more dramatic style for added impact.
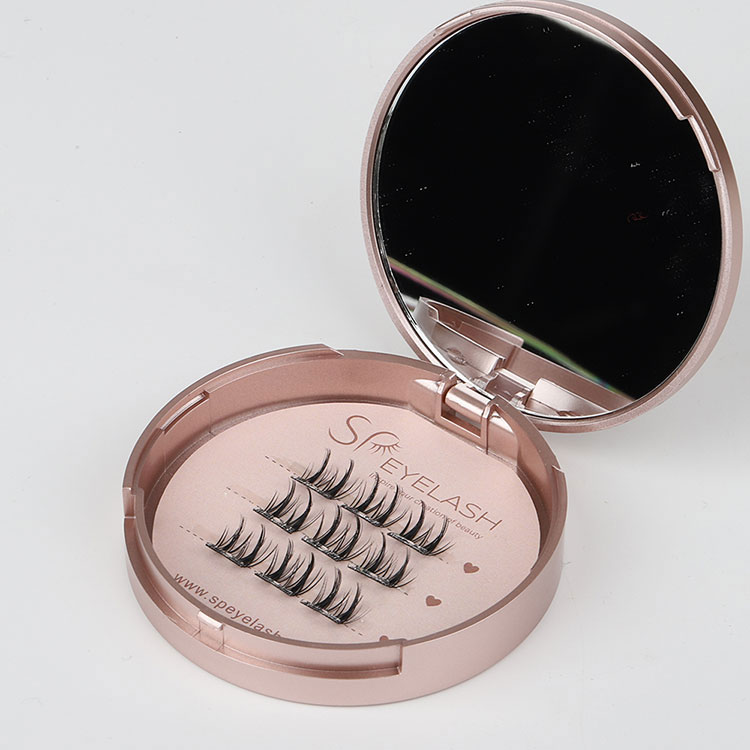
Step 2: Remove the Lashes from the Packaging
Carefully peel the lashes away from the packaging. Be gentle to avoid bending or damaging the lashes. Once removed, inspect the adhesive strip to ensure it's intact and free of debris. If the strip appears dry or worn, it may not adhere properly, and you may need to replace the lashes.
Step 3: Measure and Trim (if Necessary)
While some press on lashes may fit perfectly as is, others may require trimming to match your eye shape. Hold the lashes up to your eye and compare the length to your natural lashes. Trim the ends if necessary using a pair of sharp scissors. Be precise and cut only a small amount to avoid making the lashes too short.
Step 4: Prepare the Adhesive Strip
If the adhesive strip on your lashes is not already tacky, you may need to activate it. Some brands come with a clear film over the adhesive that needs to be removed before use. Follow the instructions provided with your lashes to ensure the adhesive is ready for application.
Step 5: Apply the Lashes
1. Position Your Eyes: Look straight into a mirror and position your eyes so that you can see the entire lash line.
2. Place the Lashes: Hold the lashes with one hand and use your other hand to gently peel off the protective film (if applicable). Place the lashes as close to the lash line as possible, starting at the center of your eye. This will help create a more natural and balanced look.
3. Press Down: Gently press the lashes down onto your lash line, starting from the center and working outwards towards the corners of your eyes. Use your fingers or a lash applicator to ensure the lashes are securely adhered.
Step 6: Adjust and Perfect
Once the lashes are in place, take a few moments to adjust them for a perfect fit. Use your fingers or a lash curler to gently curl the lashes towards your eyelids, blending them with your natural lashes for a seamless look. If any sections of the adhesive strip are not adhering properly, you can apply a small amount of pressure or use a bit of extra adhesive (if the lashes come with a spare strip).
Step 7: Add Mascara (Optional)
For an even more cohesive look, you can apply a coat of mascara to your natural lashes after applying the self-adhesive lashes. This will help blend the two together and create a more uniform appearance. Be careful not to get mascara on the adhesive strip, as this could compromise its stickiness.
Tips for a Flawless Application
· Practice Makes Perfect: Like any beauty skill, applying self-adhesive lashes takes practice. Don't be discouraged if your first attempt doesn't go perfectly. With time and practice, you'll get the hang of it.
· Use a Mirror with Good Lighting: Proper lighting is crucial for a successful application. Choose a well-lit area with a mirror that allows you to see your entire eye area clearly.
· Work Quickly: The adhesive on self-adhesive lashes can lose its tackiness over time. Work quickly to ensure the lashes adhere properly before the adhesive dries out.
· Store Properly: After use, store your lashes in a cool, dry place to preserve the adhesive and keep them in good condition for future use.
In conclusion, self-adhesive lashes are a convenient and effective way to enhance your lashes without the mess and hassle of traditional false lashes. By following the steps outlined in this guide, you can achieve a natural and stunning look that will leave you feeling confident and beautiful. With a little practice and the right tools, you'll be able to master the art of applying self-adhesive lashes in no time.
Send Inquiry


X
We use cookies to offer you a better browsing experience, analyze site traffic and personalize content. By using this site, you agree to our use of cookies.
Privacy Policy